Smoke & Lighting
My Setup and Equipment
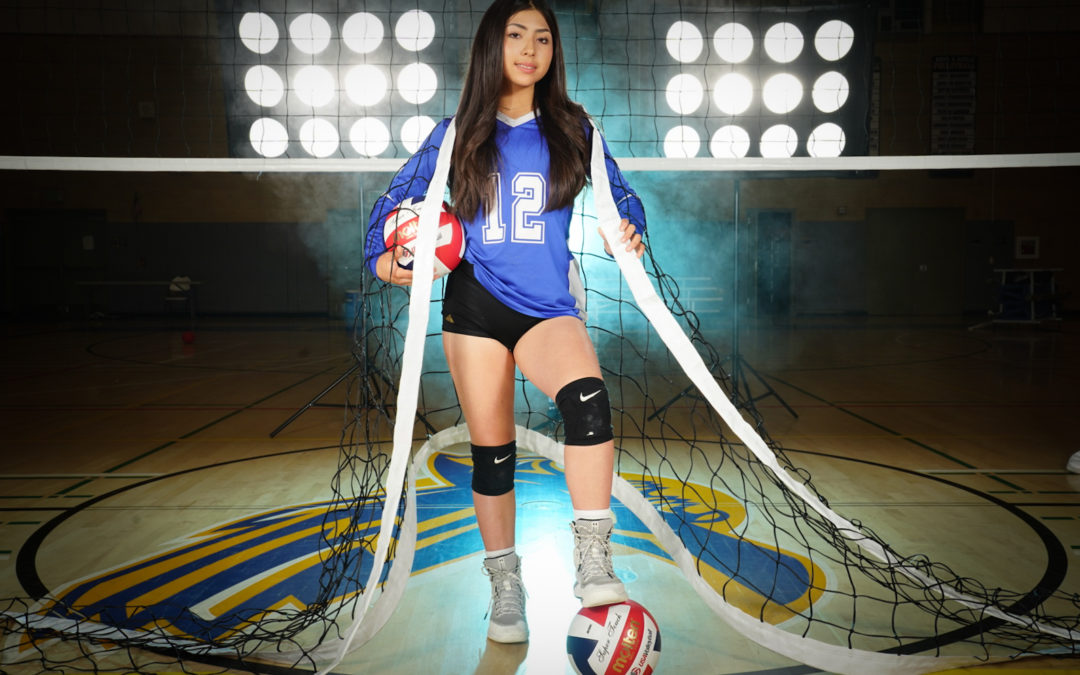
First words when the players see their photos taken with smoke and lights are “Wow!! That’s Amazing!!”
Of course, when I first started these effects, I didn’t know how it would turn out. After doing a lot of review on YouTube, and taking notes from different channels using the Atmosphere Aerosol and the Pro Light Mods, I was ready to take on the challenge.
Ordering from Amazon was a breeze for both the Atmospher Aerosol and Pro Light Mods. Once I received the order, first thing that I did was practice the setup in my living room. After an hour of two working with my dog, Mochi, I was ready!!
Here’s a video of the Otay Ranch High School JV Volleyball team. Setup was quite easy by using the Heavy Duty Aluminum Alloy Tripods for each Pro Light Mods. Once they were set up, I placed one Godox Ad 200 Pro (upcoming blog) right in the middle of each shot with a blue filter to match the school color.
Prior to each shot, a player would assist me by starting at the end of one light and then running across to the other end of the last light while spraying the Atmosphere Aerosol. Then snap…picture taken!!
Hope you enjoyed the quick video and if you have any further questions, please let me know.
EQUIPMENTS:
- Atmosphere Aerosol – https://amzn.to/4a0gwID #Ad (Amazon)
- Westcott Pro Light Mods (2-Pack) 1×4 ft. – https://amzn.to/47BM1Ht #Ad (Amazon)
- Westcott Pro Light Mods Softbox 3×4 ft – https://amzn.to/47XmHvd #Ad (Amazon)
- Heavy Duty Aluminum Alloy Photography/Video Tripod Light Stands – https://amzn.to/417yswS #Ad (Amazon)
0 Comments